First, check if JAVA_HOME is already set by start a CMD and issue:
set JAVA_HOME
If JAVA_HOME is not set, you will receive “Environment variable JAVA_HOME not defined”. Otherwise, the current setting will be shown.
To set/change JAVA_HOME in Windows:
- Launch “Control Panel”
- “System”
- “Advanced system settings”
- Switch to “Advanced” tab
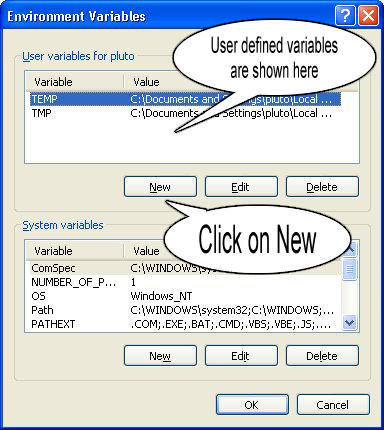
- “Environment variables”
- Choose “System Variables” (for all users)
- To add a new environment variable “
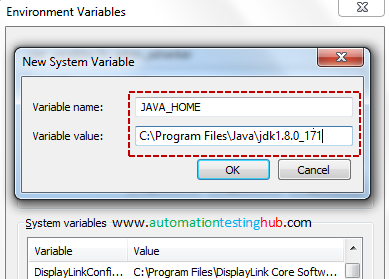
JAVA_HOME“:- Choose “New”
- In “Variable Name”, enter “JAVA_HOME”.
- In “Variable Value”, click “Browse Directory…” and navigate to the JDK installed directory (e.g., “
C:\Program Files\Java\jdk-13.0.1“). - OK ⇒ OK ⇒ OK.
- To change the existing “
JAVA_HOME” setting:- Select “
JAVA_HOME” ⇒ “Edit” - In “Variable Value”, click “Browse Directory…” and navigate to the JDK installed directory (e.g., “
C:\Program Files\Java\jdk-13.0.1“). - OK ⇒ OK ⇒ OK.
- Select “
You need to RE-START CMD for the new setting to take effect!
To verify the new setting, re-start CMD:
set JAVA_HOME
JAVA_NAME=C:\Program Files\Java\jdk-13.0.1
NB:Replace jdk-13.0.1 by your current version


